PEACH LACE CROCHET DRESS FREE PATTERN

WRITTEN IN US CROCHET TERMS •
SIZES XS–3X • 12-ROUND LACE MOTIF
Skill level
Intermediate. You should be comfortable
with chain spaces, double crochet, treble crochet, shell/fan groups, working in
the round, increasing, decreasing and joining seams.
Sizes
XS (S, M, L, XL, 2X, 3X). The pattern is
designed for a close but comfortable fit. Choose the size closest to your
actual full bust measurement, then check the waist and hip measurements against
the finished garment.
|
Size |
Body bust |
Suggested finished bust |
Approx. body stitch count |
|
XS |
30–32
in / 76–81 cm |
32 in
/ 81 cm |
160
sts |
|
S |
34–36 in / 86–91
cm |
36 in / 91 cm |
180 sts |
|
M |
38–40
in / 96–102 cm |
40 in
/ 102 cm |
200
sts |
|
L |
42–44 in /
107–112 cm |
44 in / 112 cm |
220 sts |
|
XL |
46–48
in / 117–122 cm |
48 in
/ 122 cm |
240
sts |
|
2X |
50–52 in /
127–132 cm |
52 in / 132 cm |
260 sts |
|
3X |
54–56
in / 137–142 cm |
56 in
/ 142 cm |
280
sts |
The stitch counts above are starting counts
based on the target gauge. If your lace repeat pulls in or stretches after
blocking, adjust the total by one 20-stitch repeat and reassess the fit.
Finished measurements (approximate)
Finished bust: 32 (36, 40, 44, 48, 52, 56)
in / 81 (91, 102, 112, 122, 132, 142) cm. Target waist: 2–4 in / 5–10 cm
smaller than bust, achieved with gentle side shaping. Target hip: measure your
widest hip and add 0–2 in / 0–5 cm of ease. Length from shoulder to hem: 35–38
in / 89–97 cm, adjustable. Sleeve length: 16–17 in / 41–43 cm.
Materials
·
Lightweight cotton,
cotton/bamboo or cotton-viscose yarn, category 2 (sport/fine) or a light
category 3 yarn that meets gauge.
·
Approx. 1,800 (2,000, 2,200,
2,400, 2,600, 2,900, 3,200) yd / 1,645 (1,830, 2,010, 2,195, 2,375, 2,650,
2,925) m.
·
Crochet hook: 3.0–3.5 mm, or
size needed to obtain gauge.
·
Stitch markers, tapestry
needle, measuring tape, scissors and rust-proof pins for blocking.
·
Optional: lightweight stretch
lining or slip, if you prefer more coverage.
Gauge
Blocked lace pattern: approximately 20
stitches across one 20-stitch repeat = 4 in / 10 cm, and 12 rounds =
approximately 4½–5 in / 11.5–12.5 cm in height. The chart repeat is treated as
20 stitches wide and 12 rounds high. Make and wet-block a full repeat before
choosing your hook.
|
GAUGE IS ESSENTIAL. If your swatch is wider
than 4 in, use a smaller hook; if narrower, use a larger hook. The lace
should lie flat without flaring or puckering. |
Abbreviations (US terms)
|
ch |
chain |
|
sl st |
slip
stitch |
|
sc |
single crochet |
|
hdc |
half
double crochet |
|
dc |
double crochet |
|
tr |
treble
crochet |
|
dtr |
double treble
crochet |
|
sp |
space |
|
ch-sp |
chain space |
|
sk |
skip |
|
rep |
repeat |
|
shell/fan |
5 dc
in the same stitch or space |
|
beg |
beginning |
|
RS/WS |
right
side / wrong side |
Special stitches
Fan: Work 5 dc in the indicated stitch or chain space.
Large fan: Work 7 tr in the indicated stitch or chain space.
Picot: Ch 3, sl st in the first ch made.
V-stitch: Work (dc, ch 1, dc) in the indicated stitch or space.
Lace arch: Ch 5, then anchor with a sc in the next indicated chain space or
between shell groups.
|
Turning chains do not count as stitches
unless the instruction specifically says otherwise. Join each round with a
slip stitch to the first stitch or the top of the beginning chain as
directed. |
The 12-round lace repeat
The supplied chart shows a repeating
fan-and-arch lace with a 20-stitch horizontal repeat and a 12-row vertical
repeat. Use the following written interpretation as the working repeat. It
recreates the visual rhythm of the chart; symbol details may vary slightly from
the original chart's publication conventions.
Foundation
For a flat swatch, ch a multiple of 20 + 1.
For the dress body, work a multiple of 20 stitches in joined rounds. Place a
marker at the beginning of each round.
Written repeat – flat swatch
Row 1 (setup): Sc in 2nd ch from hook, *ch 5, sk 4 ch, sc in next ch; rep from *
across. Turn.
Row 2: Ch 1, sc in first sc, *ch 5, sc in next ch-5 arch; rep from *
across, ending with sc in last sc. Turn.
Row 3: Ch 3 (counts as dc), 2 dc in first ch-5 arch, ch 2, *3 dc in next
arch, ch 2; rep across. Work 3 dc in final arch, dc in last sc. Turn.
Row 4: Ch 1, sc in first dc, *ch 3, sc in next ch-2 space, ch 3, sc between
the next dc groups; rep across. Turn.
Row 5: Ch 3, 4 dc in first ch-3 arch, sc in next sc, *5 dc in next ch-3
arch, sc in next sc; rep across. Turn.
Row 6: Ch 1, sc in first dc, *ch 5, sc in the center dc of the next fan, ch
5, sc in the sc between fans; rep across. Turn.
Row 7: Ch 4 (counts as tr), 6 tr in first ch-5 arch, ch 1, sc in next sc,
ch 1, *7 tr in next ch-5 arch, ch 1, sc in next sc, ch 1; rep across. Turn.
Row 8: Ch 1, sc in first tr, *ch 4, sc in next ch-1 space, ch 4, sc in the
next sc, ch 4, sc in next ch-1 space; rep across. Turn.
Row 9: Ch 3, 2 dc in first ch-4 arch, ch 1, 3 dc in next arch, ch 1, *3 dc
in next arch, ch 1; rep across. Turn.
Row 10: Ch 1, sc in first dc, *ch 3, sc in next ch-1 space, ch 3, sc between
dc groups; rep across. Turn.
Row 11: Ch 3, 4 dc in first ch-3 arch, sc in next sc, *5 dc in next ch-3
arch, sc in next sc; rep across. Turn.
Row 12: Ch 1, *ch 5, sc in the center of the next fan, ch 5, sc in the next
sc; rep across. Fasten off or begin Row 1 again.
|
For the garment worked in joined rounds,
follow the same stitch sequence around the tube. At the end of each round,
join neatly without twisting the chain arches. Shift the beginning-of-round
marker by one stitch if needed to keep the repeat aligned. |
How to read the chart
·
The chart is read from the
bottom upward. The circled numbers mark selected rows; work every row between
them.
·
The repeated arches represent
chain spaces. The fan-shaped groups represent several tall stitches worked into
one space.
·
The chart's bracket indicates a
20-stitch repeat. Repeat the motif evenly across the width.
·
The written 12-row sequence
above is a practical US-terminology interpretation. Compare your swatch with
the reference image and adjust hook size before making the dress.
Body – lower dress
The lower dress is worked in joined rounds
from the hem upward. This avoids a vertical seam and keeps the lace pattern
continuous. Try on the tube regularly over the intended undergarments.
1. Foundation: Ch 160 (180, 200, 220, 240, 260, 280). Join with sl st to the first
ch, taking care not to twist. Place a marker for the beginning of the round.
2. Hem setup: Work one round of sc evenly around, placing 1 sc in each chain.
Join. This stabilizes the hem.
3. Establish lace: Work the 12-round lace repeat in joined rounds, maintaining the
20-stitch repeat. Work 3 complete repeats (36 rounds) or until the fabric
measures approximately 13–15 in / 33–38 cm from the hem.
4. Waist shaping: For a gently fitted waist, decrease 1 stitch at each side marker on
every 4th round, twice. To do this, replace the stitch immediately before and
after each side marker with a dc2tog worked over those two stitches. Keep
decreases in the least noticeable chain-space areas. If your hip and waist
measurements are similar, omit these decreases.
5. Continue to underarm: Continue in the lace pattern until the tube measures approximately
24–26 in / 61–66 cm from the hem, or 2 in / 5 cm below your desired underarm
level. End after Round 6 or Round 12 of the lace repeat so the motif remains
balanced.
|
Fit check: The tube should skim the hips and
waist without pulling the chain arches open. If it is too snug, add one
20-stitch repeat at the foundation; if too loose, remove one repeat. |
Divide for front and back
6. Mark panels: Place a marker at each side of the tube, dividing it into equal
front and back halves. Fasten off at the side marker. Work the front and back
separately in rows.
7. Armhole shaping: At each side edge, slip stitch across 4 (4, 5, 5, 6, 6, 7) stitches,
then work the lace pattern across the panel. At the beginning of the next 2
rows, decrease 1 stitch at each edge. Keep the lace pattern centered; where a
full repeat no longer fits, work partial fans as dc groups and maintain the
chain arches.
8. Upper body: Continue straight until the armhole measures 6½ (7, 7½, 8, 8½, 9,
9½) in / 16.5 (18, 19, 20.5, 21.5, 23, 24) cm.
Work the front and back to the same armhole
depth. The back can be worked with a shallow neckline: continue straight until
the armhole depth is reached, then fasten off the shoulder sections leaving a
center back neck opening approximately 6–7 in / 15–18 cm wide.
Front neckline and shoulders
9. Divide front: At the start of a right-side row, work across the first shoulder
section to the center, then attach a second ball of yarn and work the opposite
shoulder. Leave the center stitches unworked to form a soft V-neck. Begin with
a center opening of approximately 2–3 in / 5–7.5 cm; widen gradually on every
right-side row by decreasing 1 stitch at the neck edge.
10. Shape V-neck: Continue each shoulder separately, decreasing 1 stitch at the neck
edge every row 2 (or every other row for a shallower V) until the neckline
reaches the desired width. Work even until the shoulder length matches the
back.
11. Shoulder seams: With right sides facing, seam front shoulders to back shoulders
using slip stitch or mattress stitch. Keep the seam flexible and do not pull
the lace arches tight.
Sleeves
Make two identical sleeves. The sleeve is
worked from the cuff upward in joined rounds, then shaped gently toward the
upper arm.
12. Cuff: Ch 60 (60, 70, 70, 80, 80, 90), join without twisting. Work 1 round
of sc. This gives a cuff circumference of approximately 12–18 in / 30–46 cm
depending on size and yarn stretch; adjust the chain count to fit comfortably
around your wrist.
13. Sleeve lace: Work the 12-round lace repeat in joined rounds. Increase 1 stitch at
each underarm side on every 6th round until the sleeve circumference measures
approximately 10–12 in / 25–30 cm around the upper arm, or matches your own
upper-arm measurement with 1–2 in / 2.5–5 cm of ease.
14. Sleeve length: Continue until the sleeve measures 14–15 in / 35.5–38 cm from the
cuff, or 1–2 in / 2.5–5 cm short of your desired finished length. The reference
dress has a ¾-length sleeve.
15. Sleeve cap: For a simple lace-friendly cap, flatten the sleeve with the underarm
at the center. Work 2 rows of sc across the top edge, decreasing evenly by 4–6
stitches per row. Fasten off with a long tail for sewing. The cap should
measure approximately the armhole opening.
16. Set sleeves: Pin the sleeve cap into the armhole with the sleeve seam aligned to
the body side seam. Sew with a flexible whipstitch, distributing any slight
fullness evenly. Repeat for the second sleeve.
Neckline and finishing
17. Neck edging: With right side facing, join yarn at one shoulder seam. Work sc
evenly around the neckline, placing 2 sc in each vertical row edge and 1 sc in
each stitch or chain space along horizontal edges. At the point of the V, work
sc, ch 1, sc in the same point to keep the edging from pulling. Join with sl
st.
18. Refine edge: Work one more round of sc or reverse single crochet (crab stitch)
for a neat finish. Keep the edge relaxed.
19. Hem: Work 1 round of sc around the lower edge. Optional: add a picot
every 5th stitch for a delicate scalloped finish.
20. Weave in: Secure all yarn ends on the wrong side, weaving through several
stitches without flattening the lace.
21. Block: Wet-block gently to the finished measurements. Pin the scallops and
lace arches open; do not stretch the fabric excessively. Allow to dry
completely.
Fit and customization
·
Length: Add or remove complete
12-round repeats from the skirt. Each repeat adds approximately 4½–5 in /
11.5–12.5 cm.
·
Sleeves: Stop earlier for elbow
sleeves or add one or two repeats for full-length sleeves.
·
Neckline: Make the V shallower
by beginning neck decreases later, or deeper by beginning them earlier.
·
Waist: Omit waist decreases for
a straighter silhouette. Add one additional decrease pair on each side for a
more fitted waist.
·
Coverage: Wear with a slip, or
line the skirt and bodice with a lightweight stretch lining. The lace is
intentionally open.
Troubleshooting
|
Issue |
Adjustment |
|
The hem flares |
Check
that the foundation count matches the gauge and that the first lace round is
not too loose. Use a smaller hook for the setup round if needed. |
|
The fabric cups or puckers |
Your tension may
be too tight, or you may have too few chain arches. Recheck the repeat and
swatch with a larger hook. |
|
The shell motifs do not line up |
Use
stitch markers every 20 stitches and verify that each repeat contains the
same number of stitches/spaces. |
|
The armhole feels tight |
Add depth to the
armhole or reduce the number of stitches slipped at the side edge. |
|
The neckline stretches |
Add a
stabilizing round of smaller-hook sc, keeping the V point neat and flat. |
Care instructions
Hand wash in cool water with a gentle
detergent. Press out excess water in a towel; do not wring. Dry flat and
reshape the lace. Store folded rather than hanging to prevent the dress from
stretching under its own weight.
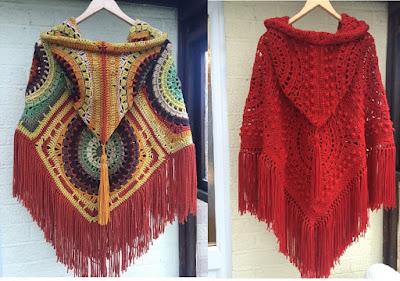
Reference images
Garment inspiration supplied for this
reconstruction:

Stitch chart supplied as the lace-motif
reference:




Comments
Post a Comment